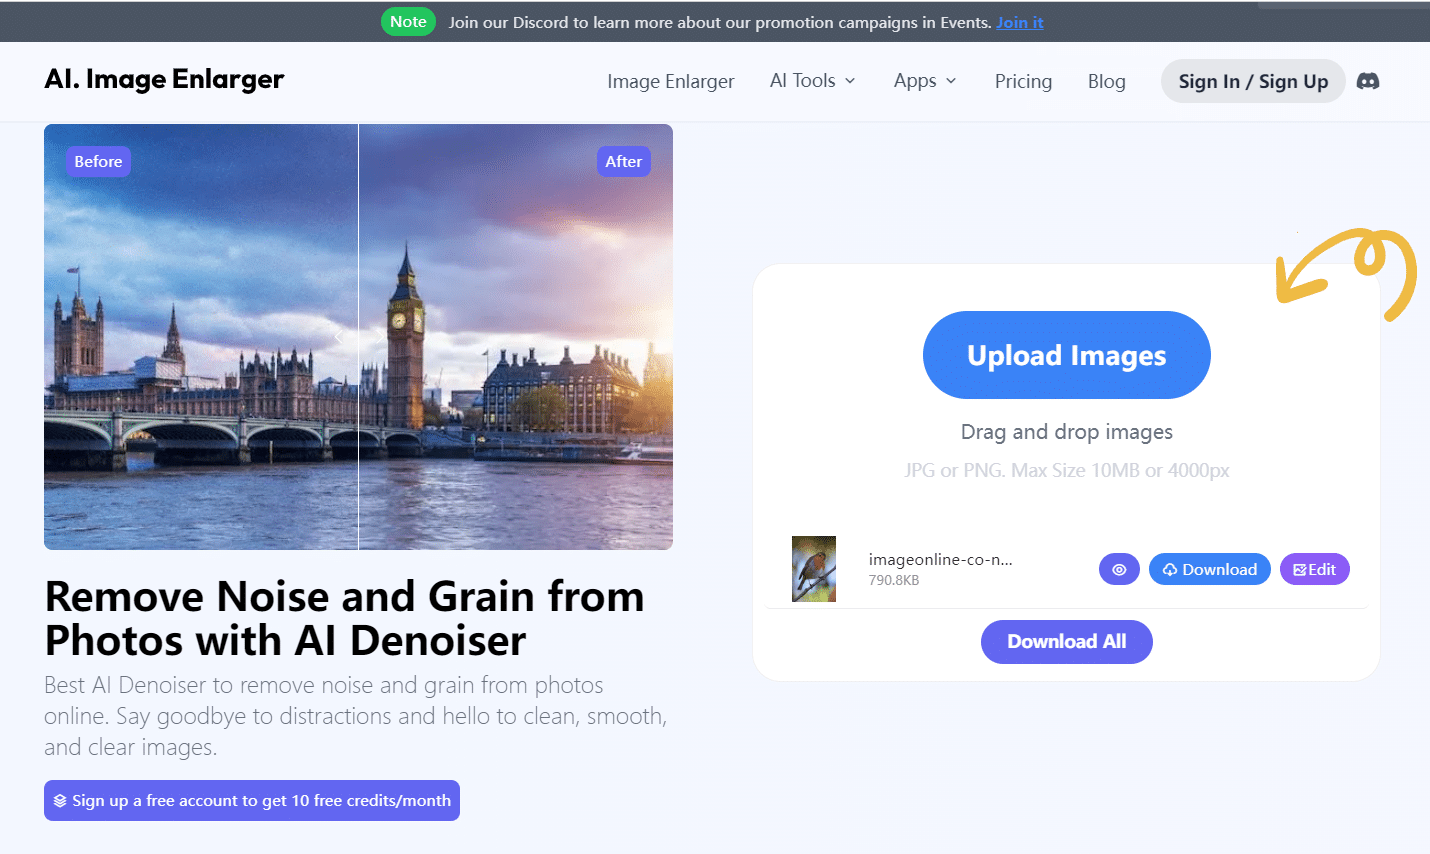
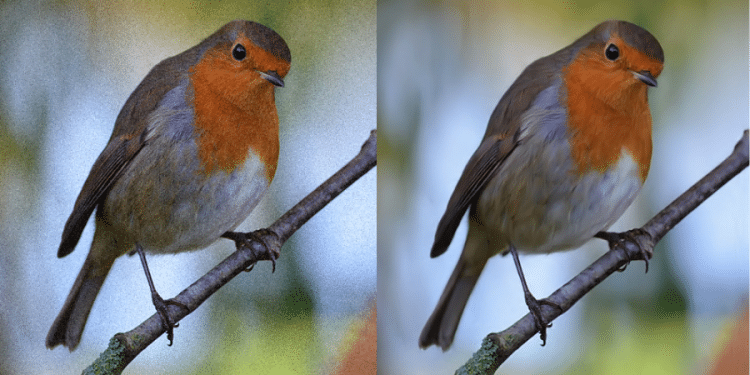
We often find noise in some of our photos while editing them. By removing them, we can get better visual results. How do you remove noise? Using the traditional photo editing software PhotoShop, have you ever tried a better solution? Noise reduction can also be achieved with AI, and the operation is simpler. Let’s look at how Imglarger’s AI image denoiser removes noise from photos!
The Issue of High ISOs: Managing Image Noise for Better Photography
One must be cautious about the inevitable introduction of image noise when it comes to low-light photography and opting for higher ISO settings. While a touch of intentionally applied grain can imbue your photos with a captivating vintage charm reminiscent of the classic film, excessive and unwanted noise can wreak havoc on your image quality.
The detrimental effects of excessive noise are especially apparent in the loss of intricate details within your photographs. Even though premium-grade cameras tend to handle noise more adeptly compared to their prosumer counterparts, it’s worth noting that every high-ISO picture can benefit from substantial improvements through the judicious use of noise reduction tools during post-production.
By understanding the nuances of managing image noise in high ISOs, photographers can elevate their craft and ensure that their low-light captures are characterized by impeccable clarity and breathtaking aesthetics.
Imglarger’s AI Image Denoiser for Stunning Images
Unveiling Imglarger’s AI Image Denoise
Imglarger’s AI Image Denoiser is cutting-edge software powered by artificial intelligence. The tool uses advanced AI algorithms to reduce noise and improve image quality. By taking the images uploaded by users and analyzing them, it identifies and removes the noise.
Whether your images have issues with graininess, artifacts, or low light, Imglarger’s AI image noise removal software makes it easy to optimize your photos. If you want to use other image editing features, Imglarger can help you with that, too. For basic editing of photos, it has 11 features. It’s easy to use and simplifies the photo editing process.
Using Imglarger’s AI Image Denoiser
To start using Imglarger’s AI image denoiser feature, follow these simple steps:
- Step 1 Upload Images: Start by uploading the images you want to enhance. Go to Imglarger, click “AI Tools” in the navigation bar and select AI Image Denoiser. Select “Upload Images” to upload images. Please note that the image format is JPG or PNG. The maximum size supported is 10MB or 4000px.
- Step 2 Edit: After uploading the image, if you want to do basic editing, click the blue “Edit” button and select the corresponding function to customise the editing according to your preferences. When you are done, click the yellow “Done” button in the upper right corner.
- Step 3 Denoise the image: Click the “Start” button and let Imglarger’s denoiser start to work its magic. You’ll see a dramatic difference within seconds, with noise eliminated and enhanced image quality.
- Step 4 Download Image: After the denoising process, download the improved image. Click the “Download” button to save it locally.
Imglarger’s AI Image Denoiser in Action
- Enhancing Vacation Photos
Imagine you’ve returned from a memorable vacation, but some of your photos were taken in challenging lighting conditions, resulting in noisy and grainy images. Imglarger’s AI Image Denoise can effortlessly transform those imperfect shots into vibrant, clear memories.
- Perfecting Product Photography
If you run an e-commerce business or sell products online, the quality of your product images is paramount. Imglarger’s tool ensures that your product photos are free from distractions, allowing customers to focus on what matters most – your merchandise.
- Elevating Portrait Photography
Portrait photographers often deal with imperfections in skin tone and texture. Imglarger’s AI Image Denoise can smooth out skin, remove blemishes, and enhance facial features while maintaining a natural look.

Mastering Noise Reduction in Photography: Pro Tips for Crystal Clear Shots
Photographers often find themselves at a crossroads in the quest for pristine, noise-free photos. The challenge lies in achieving that delicate balance between eliminating pesky noise artifacts while preserving the intricate details that make an image truly captivating. Our expert advice below will guide you through the art of noise reduction, ensuring your photos are nothing short of perfection.
Harness the Power of Raw File Format:
Regarding noise reduction, your first step should be to shoot in Raw camera file format. Unlike the limitations of a standard JPG, a Raw image file empowers you with extensive noise reduction capabilities during post-processing. Each camera brand has its proprietary Raw format, like CR2 or CR3 for Canon, NEF for Nikon, and ARW for Sony. Adobe’s Digital Negative (DNG) format is a valuable alternative for Leica and Pentax users. While the file extension may seem trivial, ensuring your software supports your camera’s specific Raw format is crucial. Most software programs are regularly updated to accommodate the latest camera models.
Embrace the Lowest ISO Settings:
To minimise noise, opt for the lowest possible ISO setting. Reducing ISO brings a slower shutter speed and a wider aperture, inevitably involving trade-offs. Slower shutter speeds may introduce motion blur, while wider apertures decrease the depth of field. Many cameras allow you to set a maximum ISO threshold to maintain noise control within your comfort zone.
Consider Upgrading Your Camera:
Investing in a superior camera can significantly impact noise reduction. As PCMag’s camera expert, Jim Fisher, suggests, a new full-frame camera is an ideal choice. While megapixel count has become less of a noise factor in recent years, full-frame models in the 24-33MP range generally exhibit less noise than their 45-60MP counterparts. Modern cameras often incorporate advanced technologies like Backside Illuminated (BSI) or Stacked CMOS chips, offering substantial advantages in noise control compared to older FSI CMOS or CCD sensors.
Illuminate Your Subject Adequately:
Proper lighting is a key element in noise reduction. Ensure your subject is well-lit and exposed appropriately in-camera to prevent noise from creeping into your shots. Relying on post-processing adjustments, such as increasing exposure or shadows, can introduce unwanted noise. When adequate lighting is challenging to achieve, mastering noise reduction techniques in software tools like Photoshop becomes invaluable, and we’ll guide you through this in the next section.
Beware of In-Camera Noise Reduction:
While some cameras offer in-camera noise reduction features, they often need more control and detail preservation. In-camera noise reduction primarily caters to JPG files, which lack the flexibility and editability of Raw format photos. It tends to over-smooth images, sacrificing valuable details in the process.
Conclusion
We have understood how noise is formed on images, and you can use some of the tips mentioned in the article to minimise it during the shooting process. Of course, you can also use Imglarger’s AI image denoiser to remove noise. Following the steps in the article, I believe you can easily achieve image noise removal. Try Imglarger’s AI image-denoising technology now and experience the difference it makes for yourself!


